Once you’ve successfully harvested your deer and you’re ready to show off that trophy-worthy deer, the next important step is proper deer hide storage until you can get it to your taxidermist.
Because as all avid deer hunters know, landing the perfect buck is just the beginning.
Deer hide storage is important because improper handling can ruin the hide before your taxidermist even has a chance to work with it.
Here are some tips to make sure that your deer hide stays in top condition, so you can be proud of your finished mount.
Whether you’re new to hunting or just need a quick refresher, these tips will make sure your deer hide storage process is on point.
Why Proper Deer Hide Storage Matters
Before we talk about the details, it’s important to understand why proper deer hide storage is so important.
A deer hide is delicate, and while it might seem tough on the animal, it can break down quickly once it’s removed from the body if not handled correctly.
Heat, moisture, and bacteria are the biggest threats to a hide.
Storing it properly ensures it stays intact, clean, and free from damage until you can take it to the taxidermist.
Start with Field Prep
The first step to proper deer hide storage begins in the field. Here’s what to do once you’ve harvested your deer:
Field Dressing
As soon as you’ve got your deer, field dressing is the next step.
The quicker you do this, the better, as it helps keep the meat fresh and starts the cooling process.
Be extra careful when gutting to avoid puncturing the stomach or intestines, as this can contaminate the hide.
Caping the Deer
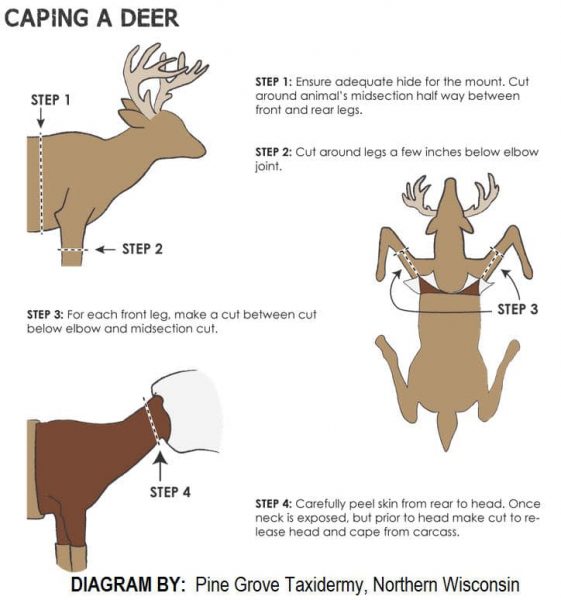
If you plan to get a shoulder mount, you’ll need to cape the deer by removing the hide from the body.
Make your cuts behind the front legs, giving your taxidermist more hide than they need.
The rule of thumb is it’s better to have too much than not enough.
Take special care with the neck and shoulder area.
Not comfortable with caping yourself? No problem—many hunters bring the entire deer to their taxidermist to handle this part.
Keep the Hide Clean
After removing the hide, keep it as clean as possible. Brush off any dirt, leaves, or blood and make sure the hide is rolled up with the fur side out.
This helps keep it clean during transport and sets you up for successful deer hide storage.
Cool the Hide Quickly
Heat is one of the biggest enemies of a good hide, especially in warmer weather. Cooling it down quickly is a key part of proper deer hide storage:
Refrigeration: If you have access to a refrigerator, this is another great option to cool the hide until you can get it to your taxidermist.
Get it out of the sun: Keep the hide in a shaded area to avoid excess heat.
Use a cooler and ice: If you have a cooler, place the hide inside with ice. Just be sure to put a towel or plastic bag between the ice and the hide to avoid direct contact with water.
Short-Term Deer Hide Storage
If you’re planning to get the hide to your taxidermist within a couple of days, refrigeration will usually do the trick. Just remember:
Keep It Cold: Whether using a cooler or refrigerator, keep the temperature around 34-38°F.
Avoid Plastic Bags: While plastic can be convenient for transport, it can trap moisture if used for long periods. Moisture can cause mold or bacteria growth, which is harmful to the hide.
Long-Term Deer Hide Storage: Freezing
If you can’t get the hide to your taxidermist right away, freezing is your best option for long-term deer hide storage. Follow these steps to freeze your hide properly:
- Roll it Up: Roll the hide from the tail to the neck with the fur side facing out. Avoid creases or folds to prevent damage when frozen.
- Seal it in a Bag: Place the hide in a large plastic bag and remove as much air as possible before sealing. If you have a vacuum sealer, that’s even better to avoid freezer burn.
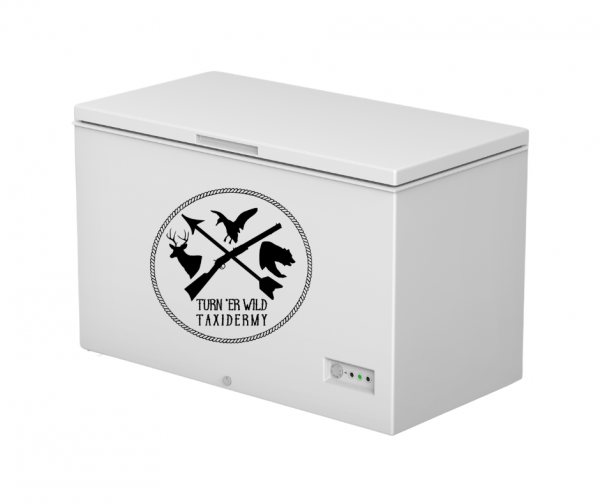
- Use a Chest Freezer: Chest freezers typically maintain lower temperatures, which is better for long-term storage.
- Don’t Freeze for Too Long: Try not to leave the hide in the freezer for more than six months. The longer it’s frozen, the more likely it is to lose quality.
Maintaining Hide Quality Before the Taxidermist
Proper deer hide storage is very important for making sure that your trophy mount turns out exactly how you want.
Starting with good field prep, keeping the hide cool and clean, and using proper short-term or long-term storage methods will ensure your hide stays in great condition for your taxidermist.
If you’re ever in doubt about how to handle or store your hide, don’t hesitate to call your taxidermist for advice.
They’ll be happy to help make sure your deer hide is stored properly and ready for that perfect mount.
When you’ve harvested that trophy deer, you want everything to go right, especially if you’re planning a mount.
By following these deer hide storage tips, you can be sure your hide is in top condition when it reaches your taxidermist.
Good luck out in the woods, and Stay Wild!